How to Send General and Consent Forms to Patients.
If your patient needs to complete paperwork or sign a consent form, you can send these documents through Practice by Numbers. You can do this through the Communication Center or the Patient Information Window.
Sending Forms via the Communication Center
1. Open the Communication Center:
- Locate the Communication Center icon at the bottom left of every page in Practice by Numbers. Click on it to open the panel on the left side of your screen.

2. Select the Patient:
- You will see recent conversations in the Communication Center. To start a new message, use the "Compose" option at the top right. To find a patient, enter their name in the search bar.


3. Send the Forms:
- Once you select the patient, you’ll see an option to send them a text. Look for the “Send General / Consent Form” option at the bottom right of the panel.
- A new window will open where you can choose which forms or consents to send. You can view pending forms for the patient and select additional forms if needed.
- At the bottom of this window, choose how and to whom the forms will be sent.


Sending Forms via the Patient Information Window
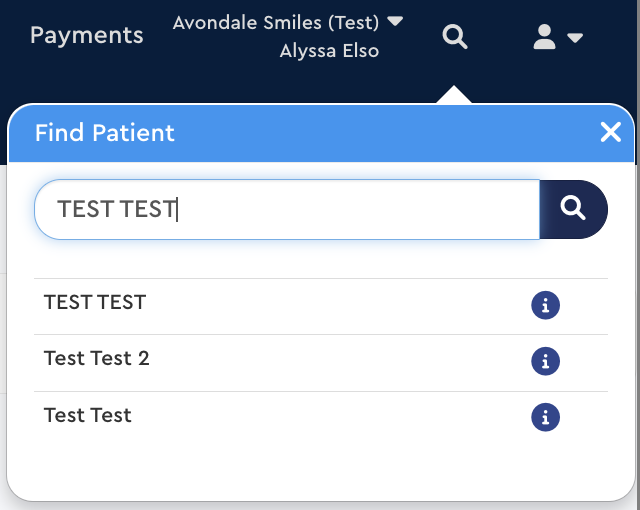
1. Search for the Patient:
- Use the search function at the top right of the website to find the patient. Click on their name to open their Patient Information Window.
2. Access Forms:
- In the Patient Information Window, go to the “Form” tab on the right side. Here, you’ll see the patient’s pending forms.
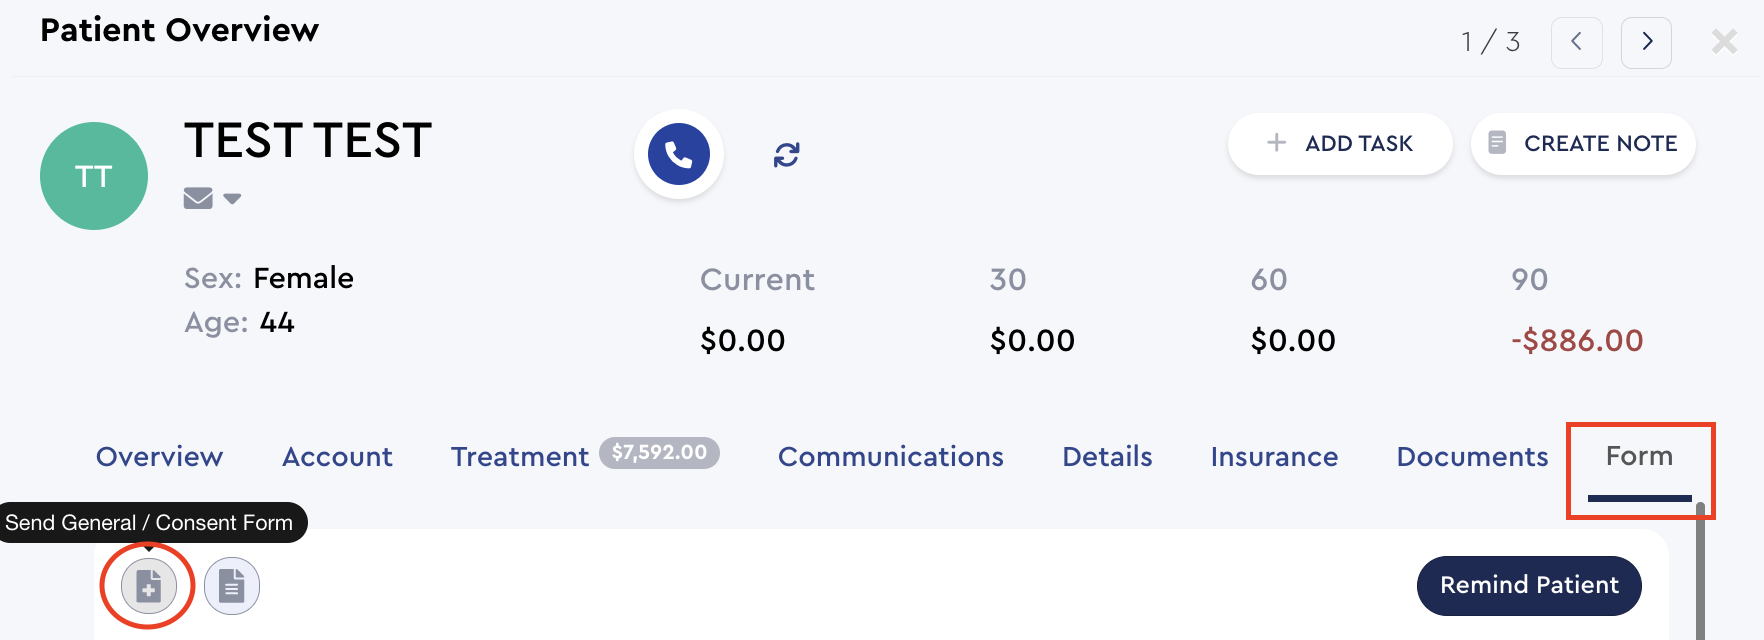
3. Send the Forms:
- Click the “Send General / Consent Form” button at the upper left of this panel to open the options for sending forms. Follow the same steps as described for the Communication Center.

Custom Tags
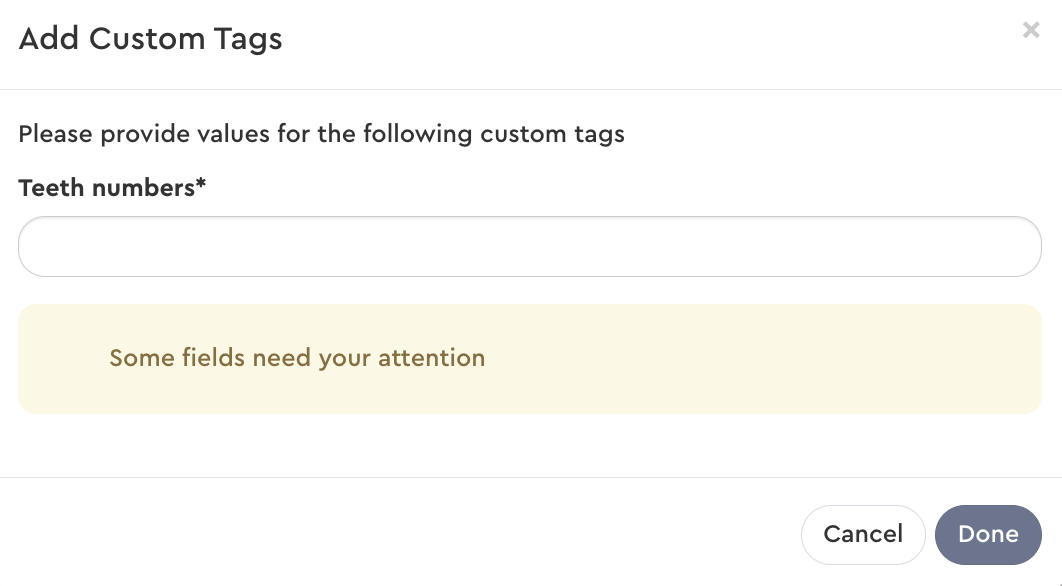
Some consent forms include Custom Tags, which require additional information before you can send the form. For instance, if a form needs specific details like tooth numbers, you will need to enter these details before sending.

- Look for fields that need input on the form. Click on the outlined icon next to these fields to enter the required information.
- Complete all Custom Tags and then hit “Send.” The form cannot be sent until all required fields are filled.


Was this article helpful?
That’s Great!
Thank you for your feedback
Sorry! We couldn't be helpful
Thank you for your feedback
Feedback sent
We appreciate your effort and will try to fix the article