Latest releases and product enhancements.
____________________________________________________________________________________________________
Campaigns
Appointment Reminder Campaign
- You will have the option to send the "Primary Same Day Reminder" and "Secondary Same Day Reminder" only to patients with Confirmed Appointments.

Setup notifications days/hours without restriction
- You can now set up reminders to trigger days/hours before the appointment without any limits.
- You can set “Save the Date” to be triggered even if you are booking an appointment for the next day.
- The system will restrict you if you configure the reminders to go on the same day so the patients do not end up receiving multiple notifications on the same date.
- However, you can configure “Save the Date” and any 1 reminder notification to go out on the same date.
Custom Campaign
- You can now set up custom campaigns even more than 4 weeks in advance without any restrictions.

____________________________________________________________________________________________________
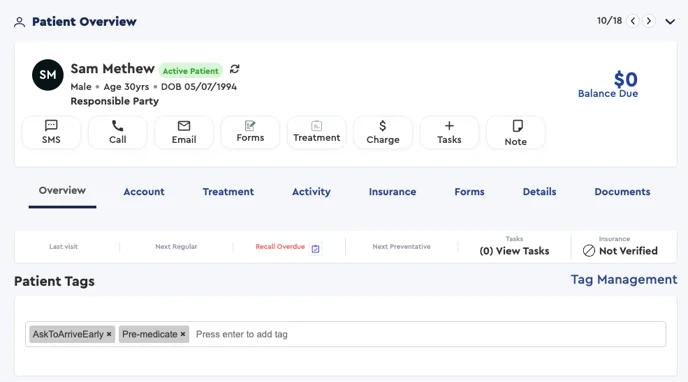
New Patient Window
- Discover the enhanced PbN Patient Window with a new layout designed for effortless navigation.
- Enjoy user-friendly accessibility with streamlined updates for easier feature access.
- Experience a more intuitive interface that prioritizes efficiency and clarity.
Quick Action Buttons
You can perform the following options using the quick action buttons.
- SMS
- Clicking the SMS button should show the numbers available for SMS.
- Next to the number, you should also see a green tick or red warning icon denoting if it's a valid number that can receive SMS or if it is invalid or a landline number that cannot receive messages.
- Clicking on any number will open the Comm Center.

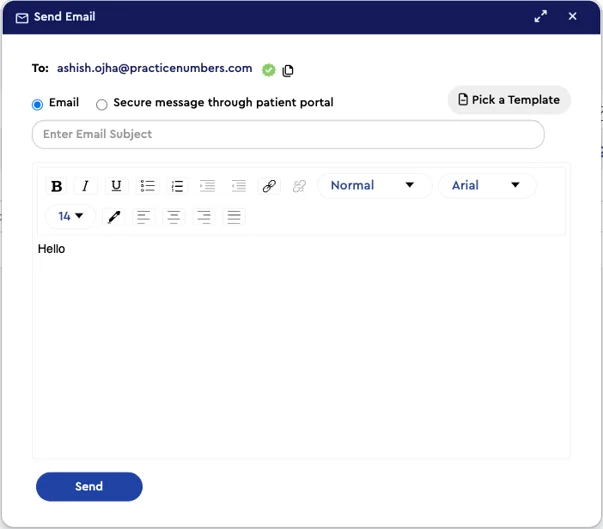
- Email
- You can send emails to patients on their email addresses or securely via the patient portal.
- Next to the email address, you should also see the green tick or red warning icon denoting if it's a valid or invalid email.
- Forms: Using this option, you can send forms to the patient.

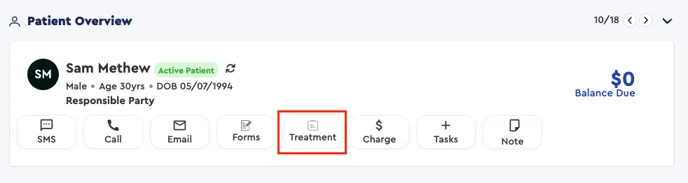
- Treatment: Using this option, you can send treatment plans to the patient.
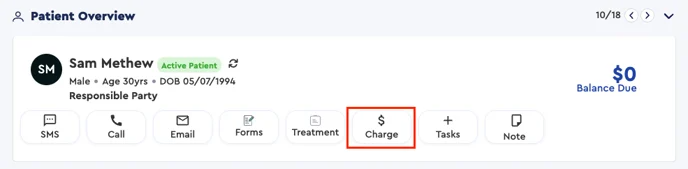
- Charge
- Using this option, you can charge a patient's card or add a new card for a patient.
- You can also send payment requests to the patient for a custom amount or pending balance.
- Task
- Clicking this button will open a window to create a task.
- You can select different task types and create tasks.
- For the Treatment Follow-Up type, you will have to select a treatment to create a task.
- For broken appointments and the pre-appointment task type, the system will ask you to select an appointment for which you want to create a task.

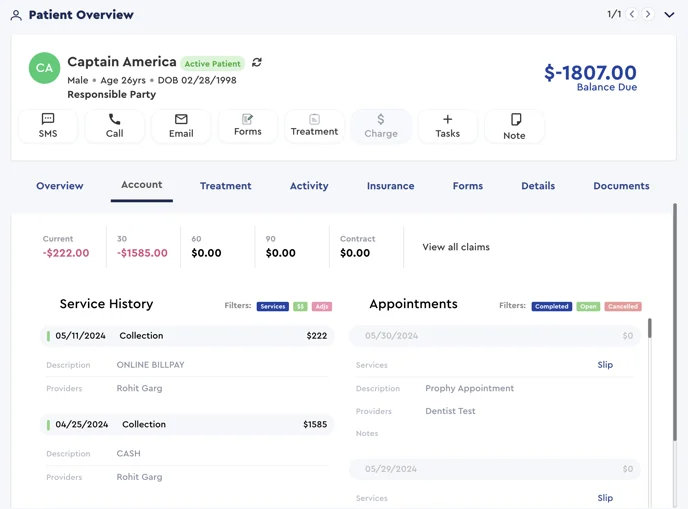
Overview Tab
- You will see the most prominent information on the top, such as:
- Last Visit
- Recall Overdue date
- Count of Open tasks
- Insurance status
- You will also have the option to apply tags.
Account Tab
- At the top of this tab, you will see financial information, including the pending balance and all the claims for that patient.

Activity Tab
- You can see all the communication logs and history, such as
- Contact log
- Patient Notes
- Patient Sequences

____________________________________________________________________________________________________
Grow 2.0 iOS App
New Improved Design
Book Appointments: You can now book appointments from the app for new and existing patients.
Team Messaging: Communicate with your team via in-app messaging.
Enhanced Patient Messaging: Send form invites, close conversations, and mark conversations as unread.
Add Patients: You can add new patients from the home screen using the '+' icon.
Enhanced KPIs: Extended KPIs for PracticeIQ and RevenueIQ with more filters.
Manage Patient Cards: You can manage patients' payment cards and charge them from the patient profile.
Forms Invite: Send forms to patients from patient messaging and the patient profile.
Intuitive Dashboard: A new dashboard to show important KPIs from the last 2 days and view action required and notifications.
Updated Patient Profile: A new patient profile with an improved design and performance.
____________________________________________________________________________________________________
Navigating the Grow App
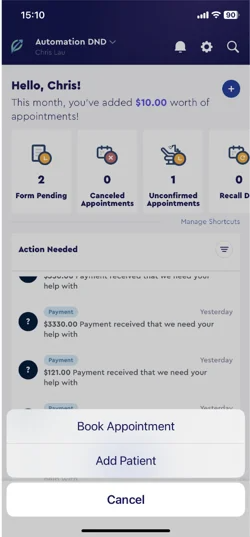
Home Screen
- This is the first screen that you see after login
- On the top of the home screen, you can view the most prominent KPIs, such as Pending Forms, Canceled Appointments, Unconfirmed Appointments, Recalls Due, Patients Going Inactive, and new patients seen.
- You can see the latest action needed with the option to view all.
- You can book a new appointment or add a new patient by clicking the “+” icon at the top right corner.
- Using the menu at the bottom, you can navigate to different screens.
- You can change the practice from the header top left corner.

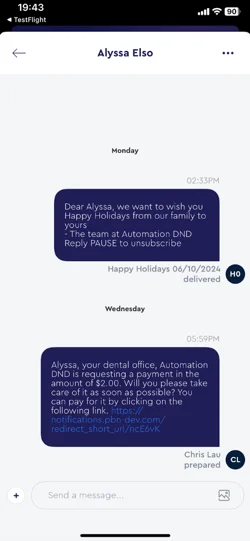
Messaging: Patient Message
- You can view ongoing conversations with the patients.
- You can start a new conversation.
- Option to search and filter the patient chat.
- You can perform the following additional operations from a patient message: send a review request, Send a Payment request, and send a form invite.

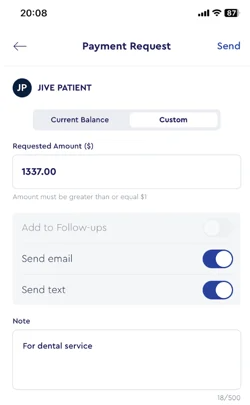
Payment Request
- From the patient message, you can now send payment requests to the patient.
- You can send payment requests for the Current balance amount and Custom amount.
- You can choose to send the payment request via SMS or email
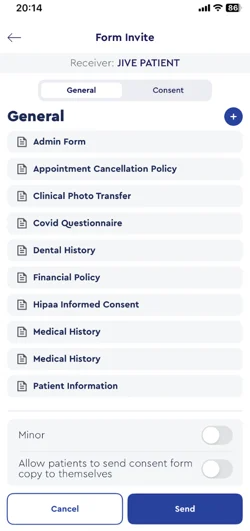
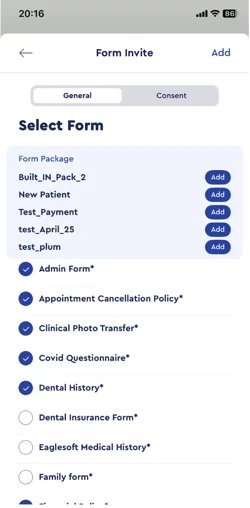
Send Form Invite
- From the patient's message, you can send forms to the patient.
- You can send a General form or consent form.
- You will see the recommended forms initially, but you can also choose to add additional forms to the list for sending.
Call Logs
- You can view the phone call log on this screen.
- For the existing patient in the call log, you can click and navigate to the patient profile.
- For unknown numbers, you will get an option to add those as a new patient.
- You can also tap on the message icon in the call logs to send a message using patient messaging.


Appointment Schedule
- List View
- You can view the list of appointments for the current day.
- You can confirm the appointments using the Confirm button.
- You can search and filter the appointments via status and providers.
- You will have the quick option of a date slider to view appointments on different dates.
- Operatory Calendar View
- View the appointments operatory-wise in the calendar view.


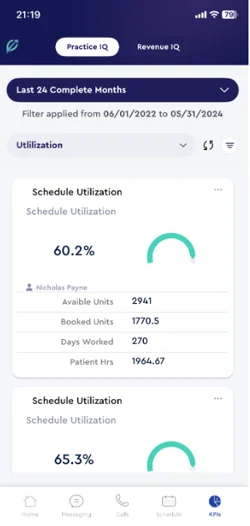
KPIs - Practice IQ
- You can view all your Practice IQ built-in dashboards on your mobile device.
- Using the dropdown on the top, you can select a different dashboard to view data.
- You can filter the dashboard data using date range, compare between dates, and filter using providers.


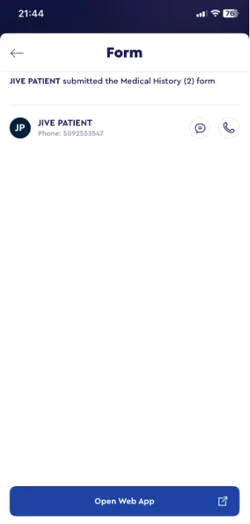
Notifications
- You can access the notifications using the bell icon on the home screen's top right corner.
- From the top, you can filter messages by Unread or All notifications.
- Clicking on any notification from the list will show the details about that notification.
- For the submitted form's notification, you will get an option to view the submitted form on the web app using the “Open Web App” button
- You can filter the notifications using notification types like Appointment Request, Appointment, Form, Payment, and Review.


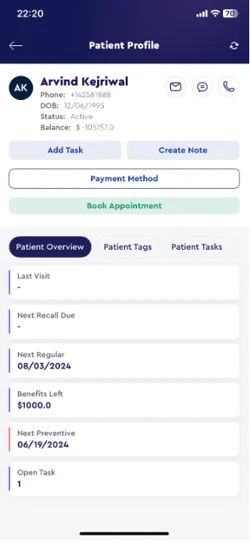
Patient Profile
- You can search for a patient from the home screen using the search icon and open the patient profile.
- You can also open a patient profile by clicking on the patient's name in the messaging.
- On the top section of the patient profile, you can view the patient's personal information.
- There will be an option to send an email, send a message, and call the patient.
- The call option will initiate the call using the mobile network.
- You will also get the option to add a task and notes for that patient.
Overview Tab
- You can view information like Last Visit, Next Recall Due, Next Regular, Benefits Left, Next Preventive, and Number of Open Tasks.
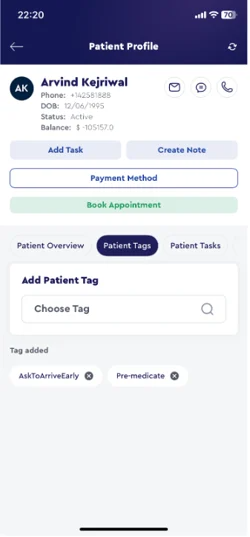
Patient tag
- You can search and apply patient tags.
- Remove already applied tags.
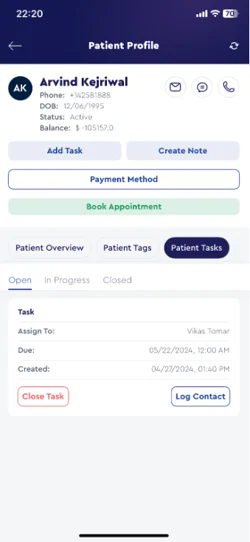
Patient Tasks
- You can view Open, In Progress, and Closed tasks
- You have the option to log contact and close the task.
Form
- You can view the pending forms for a patient.
- For pending forms, you can send reminders, mark the forms as submitted, or remove the form for the patient.
- You can also view the completed forms for that patient.
Upcoming Appointments
- You can view the upcoming appointments for a patient
- You now have the option to book an appointment and charge the patient from the new patient profile screen.

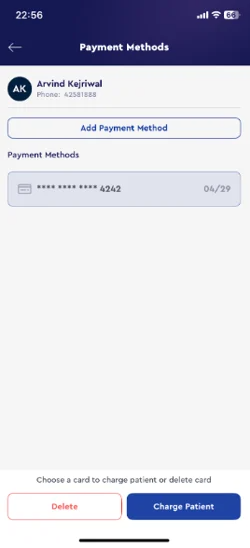
Payment Method
- You can add a patient’s debit/credit card.
- View the list of added cards.
- Select a card and charge a patient by entering the amount and charge description.
- After charging the card, you can download the receipt or send the receipt to the patient’s email.
- You can also delete the selected card.


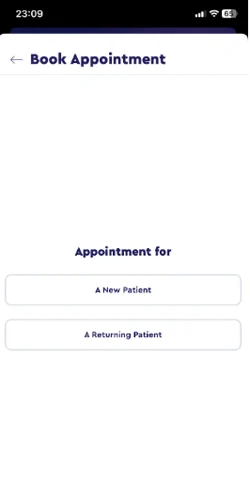
Appointment Booking
- You can book an appointment from the home screen using the “+” icon on the top right corner, or you can also book an appointment from the Patient profile.
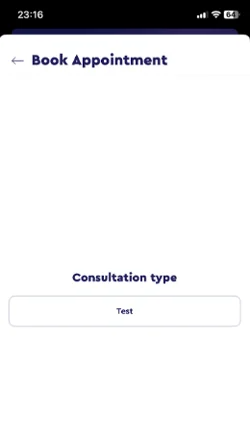
- Booking appointments for new patients.
- Select the consultation type.
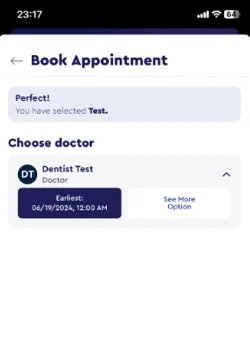
- Select a doctor to view and select its available time slot.
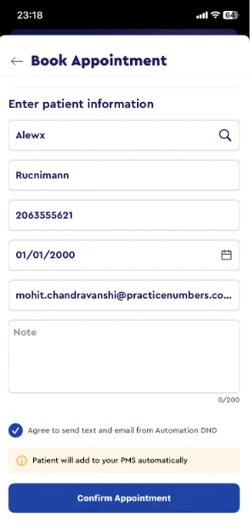
- Enter patient information like Name, DOB, Phone number, Email and Notes.
- Click on the “Confirm Appointment” button.
- Booking appointments for existing patients.
- Select the consultation type.
- Select a doctor to view and select its available time slot.
- Search and select a patient to book an appointment.
- Click on the “Confirm Appointment” button.
____________________________________________________________________________________________________
PBN Payments
PBN payments are now here, too. Here are some benefits and additional information on setting it up.
- No Platform Fees: Practices can now process transactions seamlessly without platform fees, maximizing profitability and resource allocation.
- Flexible Surcharge Rates: Practices have full control over surcharge rates, ensuring fair customer coverage of transaction costs while prioritizing convenience.
- Precision Surcharging: With precise configuration, avoid surcharging errors, adhering to regulations in US states and Canadian provinces without risking non-compliance.
- In-Office Payment Convenience: Accept payments effortlessly in-office via a Point of Sale (POS) system, reducing wait times and enhancing customer experience.
Click here for additional setup instructions.
Was this article helpful?
That’s Great!
Thank you for your feedback
Sorry! We couldn't be helpful
Thank you for your feedback
Feedback sent
We appreciate your effort and will try to fix the article