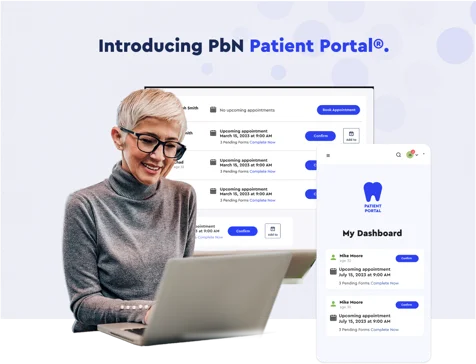
The PbN patient portal is here! The portal will offer numerous benefits for your practice and your patients. Firstly, it enhances communication and engagement by providing a secure platform for patients to access their dental records, treatment plans, and appointment schedules. This transparency fosters a better understanding of oral health, encouraging patients to take an active role in their care.
The portal will also streamline administrative tasks by allowing patients to fill out forms, update personal information, and schedule appointments online. Take a look at how to set this up on the practice side and what it will look like for your patients!
Patient Portal
Practice Side
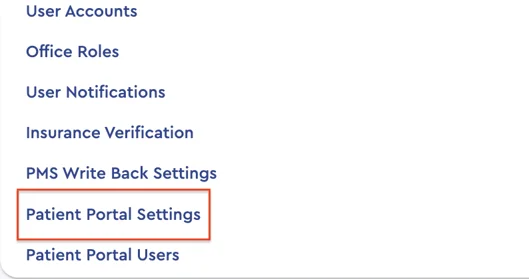
Patient Portal Settings:
- Practice Management Settings
- Color Schedule
- Portal Link
- Portal Photo
- Show all signed treatment plans in the patient portal
- Show all signed consent forms in the patient portal
- Communication templates
- Patient portal invite template
- New Document Patient Portal
- Secure Message notification
- Enable Patient Portal

Invite to Patient Portal:
- Send Personal Invitations to Patients
- Utilize the three-dot menu located in the Patient Avatar to extend invitations to individual patients. You can send an invitation via email or text and generate and print an invitation code.
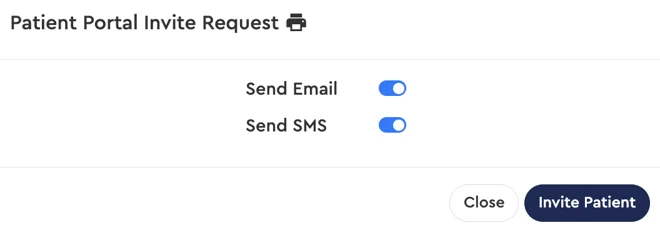
- Within the menu, a new communication option titled "Invite to Patient Portal" will be accessible. Clicking on this selection will prompt a pop-up window for inviting the patient.
- Upon selecting "Invite Patient," standardized email and SMS templates containing an invitation code and URL will be dispatched.
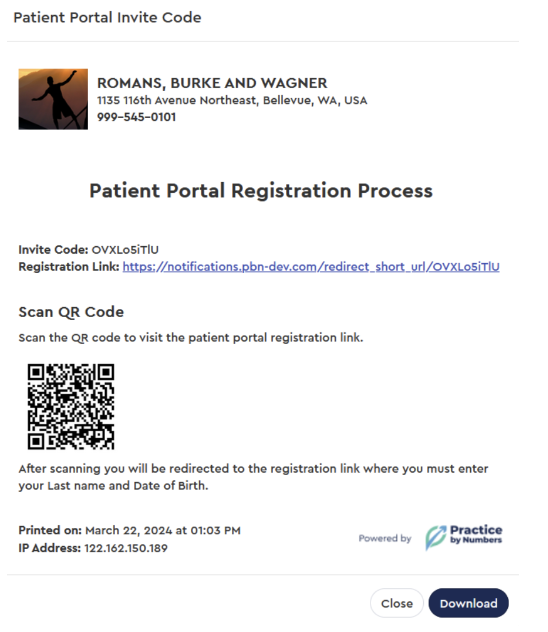
- The invitation code method proves especially beneficial when patients are physically present in the office or lack valid email or SMS contact details.
- Invitation details, including the invitation code and a QR code, can be printed for distribution. Patients can then scan their unique code, which will direct them to their personalized registration link. To print this, click the printer icon next to the Patient Portal Invite Request.

General Patient Portal Link:
- You can send your patients the patient portal link via campaigns and forms automation.
- You can also place this link on your website, where patients can directly login or register to the Patient Portal.

Patient Window > Send email> Secure Message through Patient Portal:
- You can send a secure message to the patient through the current email pop-up feature available in the patient window.
- When a secure message is shared with the patient, an email/SMS notification will be sent to them. For HIPAA compliance, the notification won't include the message content but will contain a link to the patient portal, where the patient can log in and view the secure message.
- The 'Messages' view in the patient portal will display any secure messages you have sent to the patient.

Patient Window > Documents:
- You can upload files or documents directly from the patient window, ensuring secure sharing with the patient.
- You can create a new package, assign it a name, attach files, establish an expiration date, and manage package deletions. After one year, all documents are deleted.
- When a secure file or document is shared with the patient, an email/SMS notification will be sent to them. For HIPAA compliance, the notification email will not include the file or document itself. Instead, it will feature a link directing the patient to the portal, allowing them to log in and access or download the file or document.
- The 'Records' section in the patient portal will display any documents or files you have shared with the patient.

Please note this section will only work with the Patient Portal active.
Patient Portal User - Account Management:
- You can view a list of registered users in the patient portal.
- View a list of patients associated with that user account.
- You can delete the user account or send the password reset link to the user.
- View statistics like total registered patients, total user accounts, and active users in the last 6 months.
- You can unlock the patient's account using the red lock icon if the patient has locked their account.

Patient Side
Registration:
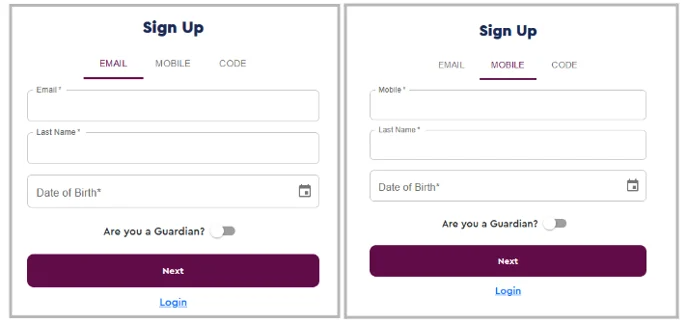
Patients will be able to signup using:
- Email: The patient will enter the email address that is registered with the practice. (This must be the email the practice has entered for the patient)
- In the next step, email will be verified via a one-time password (OTP.)
- Enter the patient's last name associated with that email in the Practice Portal.
- Enter the patient's birth date.
- If all the information matches the patient's data, the patient will be taken to Step 2.
- Mobile: The patient will enter the mobile number that is registered with the practice.
- In the next step, the mobile number will be verified via a one-time password (OTP.)
- Enter the patient's last name associated with that mobile number in the Practice Portal.
- Enter the patient's birth date.
- If all the information matches the patient's data, the patient will be taken to Step 2.
- Invite Code
- Patients can register using a unique invite code shared by the Practice.
- The invite code file will be pre-populated, and patients will need to enter their Last Name and DOB.
- If the invite code, Last Name, and DOB match the patient's data, then the patient will be taken to Step 2.
- Once the patient is validated in the above steps, as part of Step 2, they must enter a new username (email address) and password to create their account.
- The patient needs to verify the email address entered in their username. Upon verification, the patient will be able to log in using their username and password.

Login:
- Returning users can log in by entering their registered email address and password.

My Dashboard:
- Upon the patient's initial login, they will be directed to the My Dashboard page. This section will offer a summary including the following:
- An appointment overview is provided for the patient and their family members.
- Visibility of upcoming appointments for the patient and their family members.
- Confirmation options for upcoming appointments.
- Ability to schedule an appointment if a recall or cleaning appointment is due or overdue.
- Display both upcoming appointments and overdue cleaning appointments if applicable.
- Ability to review pending forms related to their upcoming appointments.
- The ability for patients to add appointments to their calendars.
- Outstanding balance or payment amount requested.

Appointments:
- Patients can view upcoming, canceled, and completed appointments for themselves and their family members.
- They can also add upcoming appointments to their calendar and confirm these appointments.

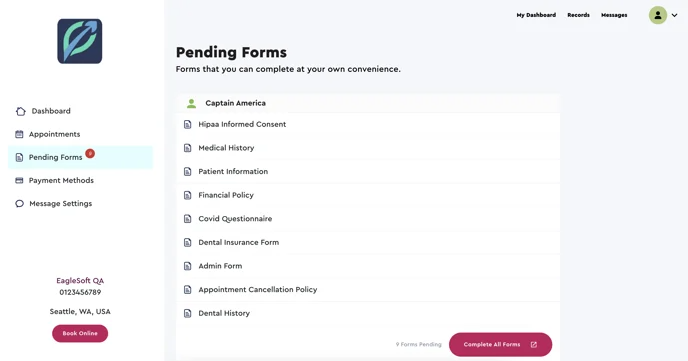
Pending Forms:
- Patients can complete any pending forms for themselves and their dependents.
Payment Methods:
- Patients will have the option to add a new credit card to their account.
- They can view and remove previously saved cards on their account.
- Patients can also set a particular card as their default payment method.

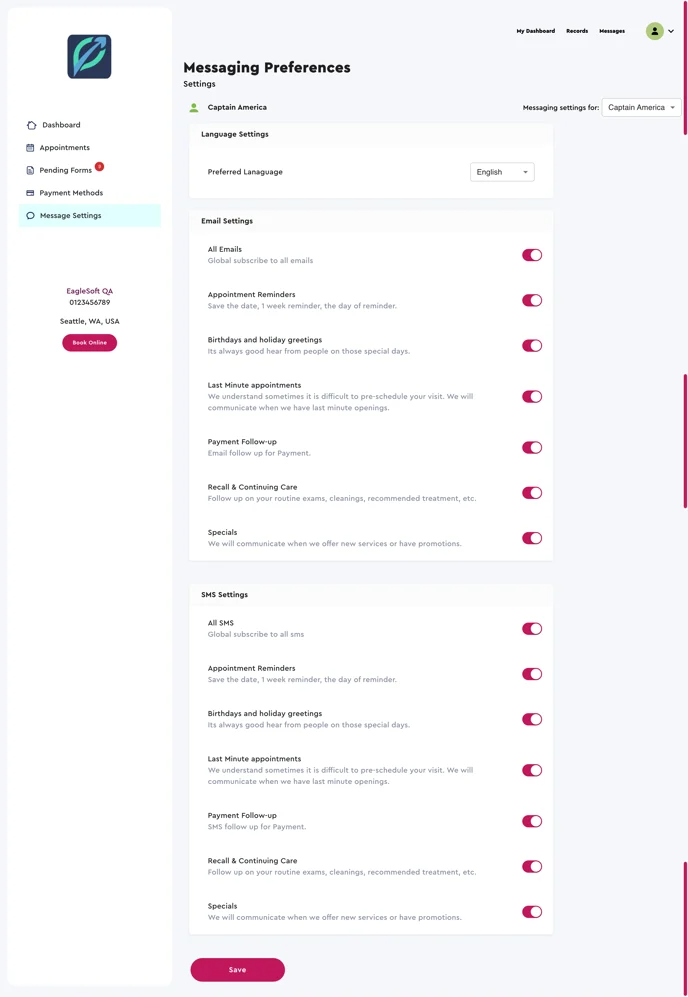
Message Settings:
- Patients will have the capability to establish language preferences for both themselves and their family members.
- Patients will have the capability to specify communication preferences for both themselves and their family members.
- Patients will have the capability to designate the person who will receive appointment reminders for minor family members.
Book Online:
- Patients can schedule appointments online, provided the Online Appointment Booking feature is active for the practice.
- Patients will not be asked to specify if they're new or existing; they will be directed straight to the appointment visit type page since their Patient ID is already established.

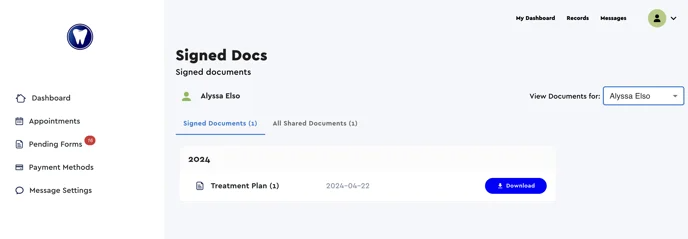
Records:
- The records tab will display securely shared files or documents accessible to the patient.
- Patients can filter records based on signed and shared documents.
- They can also filter records by family members.
- Additionally, patients can download the shared files or documents.
- Patients will be able to view their signed treatment plans and consent forms if the following filters are selected in Portal settings:
- Show all signed treatment plans in the Patient Portal
- Show all signed consents in the Patient Portal

Messages:
- The messages tab will display securely shared messages with the patient.
- Patients can filter messages received based on All and Unread.
- They can also filter messages by family members.
- Additionally, patients can delete the messages.

Account Security Lock:
- The patient's account will be locked after entering the wrong passwords 5 times.
- The patient can unlock their account using the "Forgot Password" link or by contacting the practice.

Was this article helpful?
That’s Great!
Thank you for your feedback
Sorry! We couldn't be helpful
Thank you for your feedback
Feedback sent
We appreciate your effort and will try to fix the article