How to Use Routing Slips Within Patient Flow
Patient Flow helps you track your patients through your operatories and facilitates team communication throughout the practice. Each patient on your schedule will have a Routing Slip for additional notation and tracking.
This feature, available on the Practice by Numbers (PbN) website, and works best on the desktop app, where custom notifications can be generated.
Getting Started
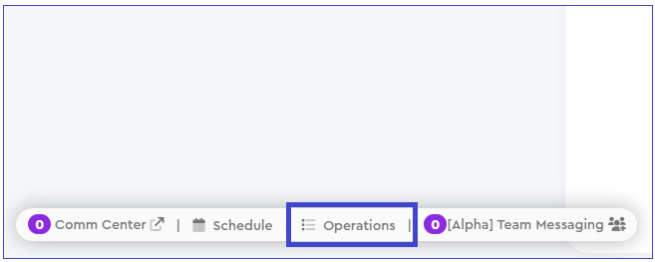
- Open Patient Flow: Click the Operations button at the bottom left of any PbN page or select its icon on the left side of the desktop app.

Viewing Patient Status
- The Patient Flow menu displays the current status of each patient.
- To the right of each patient, click the small icon to open their Routing Slip.

Understanding the Routing Slip
1. Patient Information:
- Top Section: Displays the patient's name, DOB, PMS alerts, last service dates, and PbN alerts.

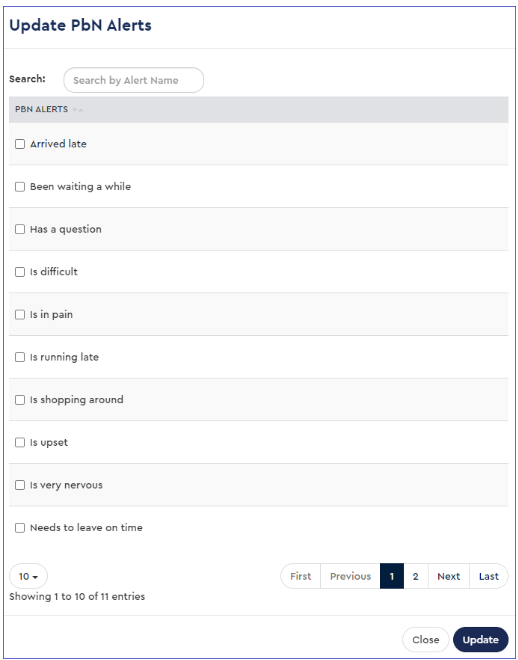
- PbN Alerts: Specific to the appointment and routing slip. Add alerts like "arrived late," "is upset," "is nervous," or "been waiting a while." These options can be customized in settings.
- Last Service Dates: Only displays selected appointment types in Patient Flow Settings.

2. Appointment Details:
- Information: Includes the date/time, appointment notes, and codes.
- Multiple Appointments: If scheduled back-to-back, you can select which appointment to view on the same routing slip.
3. Service Codes:
- Checkboxes: Indicate if a service wasn't completed.
- Additional Codes: Add any services completed but not originally scheduled.

4. Notes:
- Appointment Notes: Sourced from your PMS.
- Additional Notes: Specific to the routing slip and do not write back to your PMS. Used to share information as the patient moves through check-in, operatory, and check-out.
5. Other Sections:
- Next Visit, Dispense/Sell, Referrals: Use these dropdowns to note tasks for checkout. Options can be customized in settings.

- Save Changes: After making changes, click Save at the bottom right.
Viewing Changes
- After saving, the routing slip icon on the Patient Flow page will display a red triangle indicating changes.
- Hover over the icon to see an overview of changes without opening the full window.

Viewing Previous Routing Slips
1. Through Patient Flow:
- Change the date at the top of the page to navigate to previous days.
- Completed appointments for that day will list with the routing slip icon.

2. Patient Information Window:
- Access by selecting a patient's name or searching for it at the top right.
- Navigate to the Account tab to see a list of appointment history with routing slips for each appointment.

Attachments (13)


Was this article helpful?
That’s Great!
Thank you for your feedback
Sorry! We couldn't be helpful
Thank you for your feedback
Feedback sent
We appreciate your effort and will try to fix the article