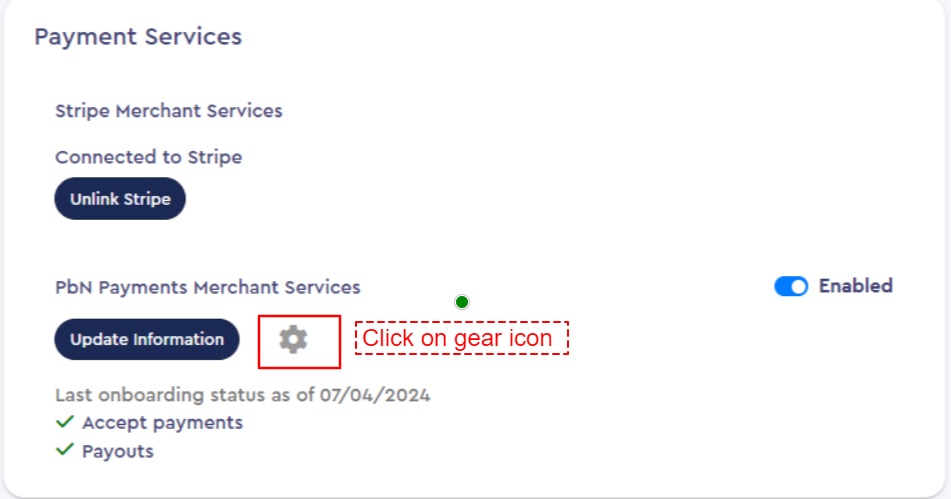
Step 1: Access Terminal Settings
- Go to the “Settings” page.
- Under the “Payment Services” section, find “PbN Payments Merchant Services” and click the gear icon.

Step 2: Update Terminal Display Name
- When you click the gear icon, a new window will open with an updated interface.
- In this window, you will see a list of all terminals assigned to your practice.
- Locate the field labeled “Display Name” and enter the new name for the terminal. The name can be up to 50 characters long.
- Once you've made your changes, click “Save.” The terminal’s display name will be updated, and this new name will also appear in the charge modal.


Was this article helpful?
That’s Great!
Thank you for your feedback
Sorry! We couldn't be helpful
Thank you for your feedback
Feedback sent
We appreciate your effort and will try to fix the article