Welcome to the first-time setup guide for your Castles S1F2 terminal. Follow these steps to ensure your terminal is correctly configured and ready to process payments.
Step 1: Familiarize Yourself with Terminal Components
Before diving into the setup, take a moment to familiarize yourself with the terminal’s components.

Step 2: Power On and Initial Setup
1. Connect to Power Supply:
Plug the terminal into a power source. Press and hold the power button until the display turns on. Before proceeding with the setup, it’s recommended that you let the battery charge for at least four hours.
2. Select Language:
On the Welcome screen, choose your preferred language, then tap the arrow button to proceed.

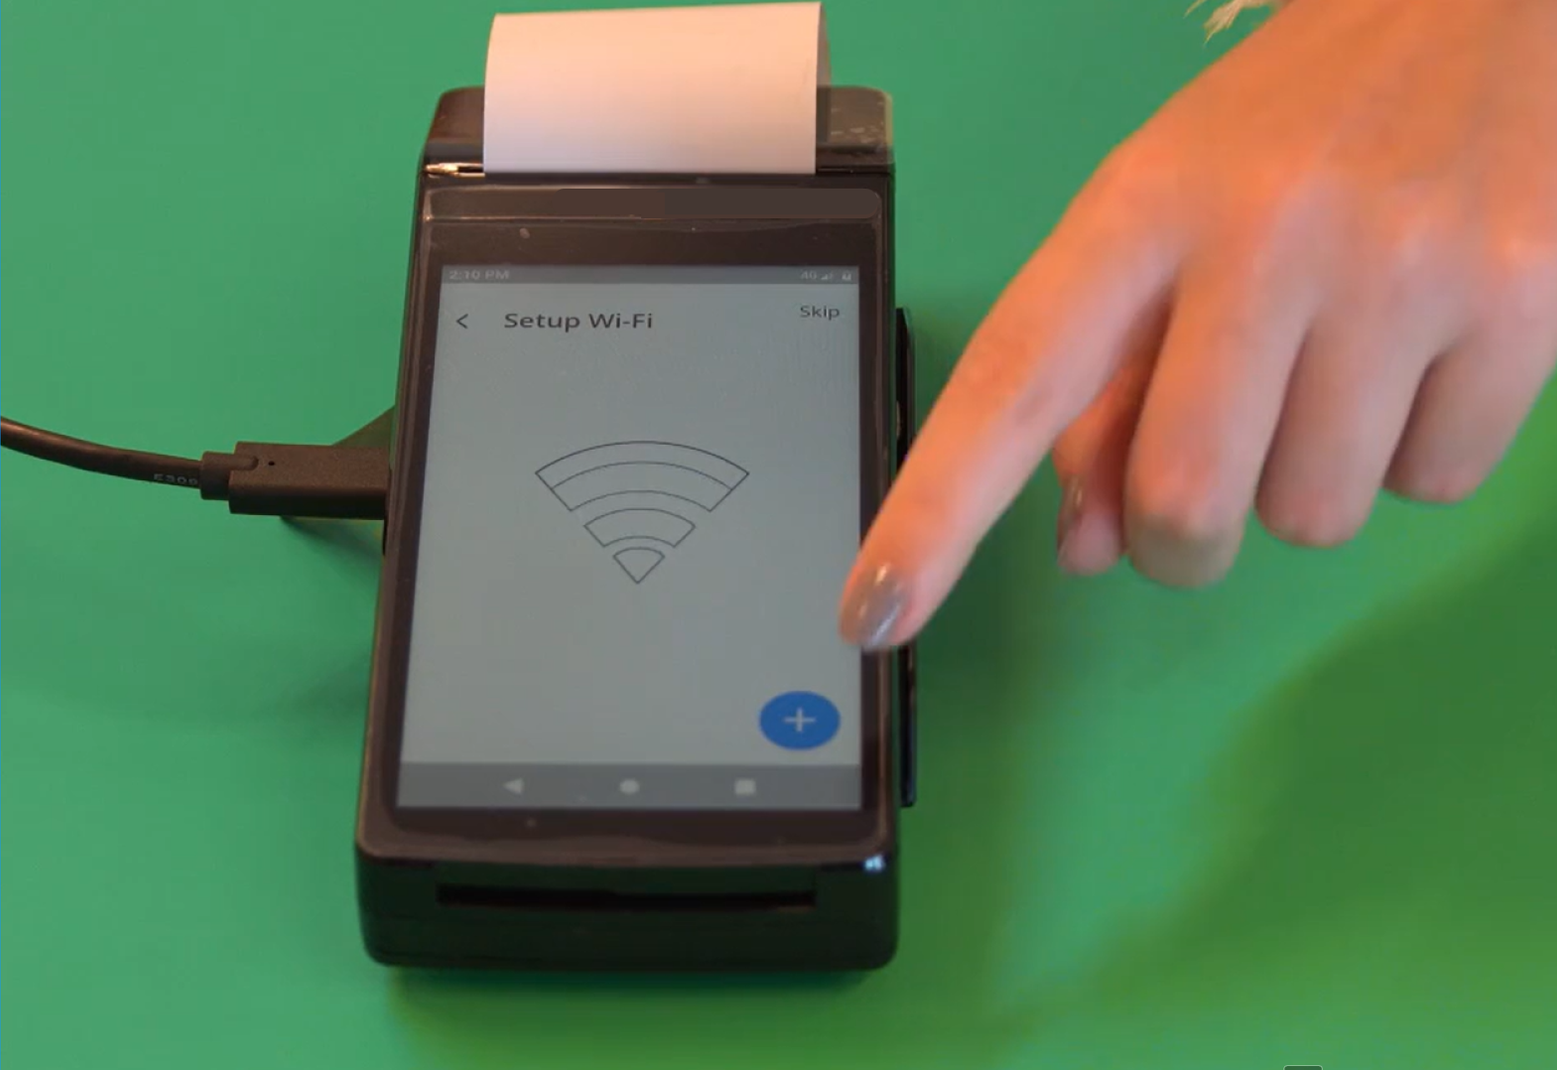
Step 3: Connect to Wi-Fi
1. Setup Wi-Fi Connection:
On the Setup Wi-Fi screen, tap the "+" icon.
2. Enable Wi-Fi Scanning:
When prompted to turn on Wi-Fi scanning, tap "TURN ON," then use the back arrow at the top to return to the Wi-Fi screen.
3. Enable Wi-Fi:
Tap "Use Wi-Fi" on the Wi-Fi screen to activate the Wi-Fi capability.
4. Select or Add Wi-Fi Network:
Choose a Wi-Fi network from the list or tap the "+" icon to manually add your network's name (SSID). Enter the Wi-Fi password, then tap "CONNECT."
5. Configure Wi-Fi Preferences:
After connecting, tap "OK." On the Wi-Fi screen, select "Wi-Fi preferences." Enable "Turn on Wi-Fi automatically." Use the back button at the bottom of the screen to return to the previous menu.


Step 4: Cellular 3G/4G Failover
Your S1F2 terminal has a pre-installed and activated SIM card, allowing it to switch to a cellular connection if your Wi-Fi fails. This ensures continuous payment processing even when your internet connection is down.
Step 5: Required Setup Time
When turning on your terminal for the first time or after it has been off for an extended period, it may perform a maintenance call to synchronize its configuration and update its software. This process can take 20 to 30 minutes. During this time, the battery will continue to charge if connected to a power source.
Step 6: Powering On/Off the Terminal
Power On:
To turn on the terminal, press and hold the power button until a dialog box appears, then tap "Power On." If the battery is low, connect the terminal to a power source.Power Off:
To turn off the terminal, press and hold the power button until a dialog box appears, then tap "Power Off."
Was this article helpful?
That’s Great!
Thank you for your feedback
Sorry! We couldn't be helpful
Thank you for your feedback
Feedback sent
We appreciate your effort and will try to fix the article